Polymer Clay Fan

Free Sculpting Tutorials

Search Results

Polymer Clay Oven

Posted by goregt On March - 18 - 2007

Baking polymer clay sculptures in the oven

One of the best properties for polymer clay is that a kiln is not necessary to cure the clay. Polymer clay can be baked at low temperatures and the household oven or toaster oven is all that you need.

I predominately use Super Sculpey so the instructions below will use Super Sculpey for the example. However, no matter what clay you use, you should be able to see baking instructions for it on the box or container that the clay came in.

Read the rest of this entry »

Polymer Clay History

Posted by goregt On September - 9 - 2009

What is Polymer Clay

Polymer clay is a material you can sculpt. It is based on polymer polyvinyl chloride (PVC) material. It usually contains no clay minerals and is only called “clay” because its texture and properties resemble mineral clay. Polymer clay is sold in craft, art and hobby stores. It is used by artists, hobbyists and children.

All polymer clay brands include PVC and one or more liquid plastic. Pigments may be added to the base to create colors along with small amounts of kaolin or white china clay. Mica may also be added to make a metallic looking clay.

Read the rest of this entry »

Polymer Clay Vase

Posted by goregt On May - 26 - 2007

Creating a Marbled Vase

This is a quick and easy tutorial that will demonstrate how to take a plain Jane glass vase and turn it into a work of art with the help of a little polymer clay. This is the first time I have ever done something like this myself so at the end of the page I will cover some lessons learned.

This really is a simple tutorial and I’m convince just about anyone can easily create a marbled vase. If it seems a little challenging at first then just keep practicing and it will come to you in no time at all.

The polymer clay I am using for this particular piece is Premo.

Glass vase filled with Premo polymer clay No need to cringe, you do not need that much clay for this tutorial. I was shopping at my local Hobby Lobby and went a little overboard on the clay. All is good since I will have plenty of clay for future projects. To give you an idea on how much clay you will need, I ended using less than one block of two or three colors by the time the vase was completed (My glass vase is around five (5) inches tall).Note: Make sure the glass vase that you purchase can be baked in an oven.
Polymer Clay Premo The first step is to condition the clay. Premo is a little firmer then the clay I normally use, Super Sculpey, so a pasta machine comes in handy here. I’m only using two colors on my vase so I keep rolling out the clay until it is fully conditioned.
Marbled clay The next step is the mix the two colors together and roll them both through the pasta machine. I repeated this step several times until I got a design I was happy with. Just roll the clay, fold, squish it together and roll it again. You don’t want to fully blend the clay, the key here is to keep the marbled look.
Applying polymer clay to the vase Simply press the clay onto the glass vase. I started from the bottom and worked my way up on this piece.
Polymer clay vase tutorial Still applying clay to the vase.
Smoothing out the clay Using one of my dental tools I blend the individual pieces together. Spend some time on this stage since you want the clay to look as if it was on piece. Try to avoid parting lines if possible.
Polymer clay vase art Once you create your own vase you will see how easy this tutorial really is. I personally like to try and take things to the next level when I create my art. A marbled vase is cool but a marbled vase with art hanging off of it is much cooler. I sculpted an Indian on my vase just to give it a little something extra.Tip: To cure the piece bake it in the oven at 275 degrees for 30 minutes (per 1/4 of an inch).
Profile of polymer clay vase A side view of my vase.Probably 98% of the colors on this vase are made up of clay. I added a little paint to tint the skin but other than that no paint was applied to this piece.

Lessons Learned

As I stated at the beginning of this tutorial, this was the first time I have tried something like this. The vase was a good learning experience for me and I did learn a few good lessons along the way. Here are a few tips I plan to use in the future:

1. Wear surgical gloves when sculpting a vase – No issues with the skin here, I just ended up with tons of fingerprints in my piece. Latex gloves would have been a quick and easy solution to avoid any fingerprints. Alcohol can remove the fingerprints but that is a lot of extra work.

2. Don’t rush the project – in all honesty this is not my favorite piece that I have created. I have a lot of other projects I should have been working on but just had to give this idea a try. I only gave myself a few hours for this piece and now looking at it I wish I would have set aside a little more time. All is not lost since I really did learn a lot by creating this vase.

3. Keep your area clean – key warning here, little clay particles lying around will somehow end up in your lighter clays. Also be sure to clean off the pasta machine before mixing different colors of clay.

That’s it! I’ll be sure to do more vases in the future and will probably show more of the sculpting stages in the process. The goal for this tutorial was to show you how you can mix glass and polymer clay to create a piece of art.

Until next time,

– Gerald

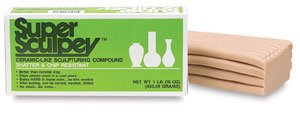
Super Sculpey

Posted by goregt On September - 8 - 2009

Super Sculpey

Out of all the polymer clays that I have used thus far Super Sculpey is by far my favorite. It is a huge improvement over the original Sculpey which in my opinion is way too soft for detailed sculpting. Super Sculpey offers the best of both worlds by being firm enough to sculpt a high level of details but also soft enough to manipulate the clay with ease.

If there is one disadvantage or downfall with Super Sculpey it is that the color has a tendency to make it harder to see things like fingerprints in the clay. The light beige color is translucent and after hours of sculpting it can put a strain on your eyes (or at least mine). There are ways around this and the easiest fix is to mix Super Sculpey with another colored polymer clay like Fimo or Premo. I’ve done this many times and the color that I like to best work with is a medium shade of gray. Gray is easier on my eyes and makes it to see all of the details, including the unwanted fingerprints. Read the rest of this entry »

Shiflett Brothers

Posted by goregt On September - 7 - 2009

From time to time I plan to write a post highlighting the artists that have had a positive influence on my own artwork. As I have stated many times before I for the most part am a self-taught sculptor. I’ve never taken a formal sculpting class and most of the techniques that I have learned up to now have been through a lot of trial and error (in some cases mostly error) and various forums and tutorials from other websites on the web. I still believe that I have a long ways to go before I become the skilled artist that I want to be, however I have progressed a lot over the past few years. I owe that progress to a lot of tutorials from a handful of sculptors that are out there today.

When I first started sculpting in November of 2003 the only clay that I was familiar with or even knew existed at that time was the water based clays. I had never even heard of polymer clay and naturally when I started my sculpting journey I picked right up from where I left off during my high school art experience. I did a brief two to three week sculpting project back in high school so I was already familiar with some of the basics for sculpting with water based clays (i.e. How to remove the air bubbles, making the sculpture hollow, firing the sculpture in a kiln but nothing on how to sculpt different forms, etc). Read the rest of this entry »

Attaching the Arm to the Shoulder

Posted by goregt On August - 14 - 2009

Attaching the arm

All right, so we have rebuilt the arm and now it is finally time to reattach it back to the sculpture. I went ahead and baked the existing arm so that I did not mess up any of the details. In hindsight this method could be improved if you planned to use the polymer clay sculpture as a final piece.

Even though the arm did attach relatively well there are a few weak points which I will point out in a minute. If I had to do it all over again I would want to do a better job of anchoring the arm into the shoulder instead of relying on a thin piece of clay as the support (probably would use wire, some form of bondo or superglue – however make sure whatever you use is not toxic if you have to heat it up in an oven or with a heat gun).


  1. Apply a thin layer of Vaseline to the base of the arm and the shoulder where the arm is missing.
  2. Add a layer of fresh clay to the arm
  3. Attach the arm and blend the clay from the shoulder to the upper arm
  4. Bake the sculpture (or heat the area with a heat gun)

Read the rest of this entry »

Sculpting FAQ

Posted by goregt On May - 9 - 2008

How long have you been sculpting: As of writing this a little over 4 1/2 years (started in late November 2003)

How did you learn to sculpt (any formal education)? Self-taught.  Just bought some clay and started playing with it.

Do you make a living as an artist? Nope, went to school to get a BBA in Management Information Systems because I bought into the whole “starving artist” mentality. I’m working on undoing that mentality 😉

Read the rest of this entry »

Attaching Fiddle Neck

Posted by goregt On May - 20 - 2007

Attaching the neck to the fiddle

Ok, now that we have a pre-baked neck for our fiddle it is time to attach it the body. For this particular sculpture there has been a lot of sculpting then baking and then sculpting again. I’ve already baked various components of the fiddle multiple times through this series and will be baking a few more times before everything is completed. Not all of my sculptures work this way, in actuality most don’t, but for this piece is just seems to be the best approach. Once a piece is baked it is hard and easier to work with. The key is to be able to add more clay to the baked piece so that you can add the details. You will wee exactly what I mean in the next couple of lessons.

The polymer clay I am using for this particular piece is Super Sculpey.

Read the rest of this entry »

Fiddle Neck

Posted by goregt On May - 20 - 2007

Cutting out the neck of the fiddle

If I had to do this all over again I would have handled the neck on the fiddle a little differently. Instead of attaching the neck at the top of the body, I would have attached it more towards the center of the fiddle’s body (part of the neck would have laid on top of the body to give it more support). It is too late to turn back now and I can still work with what I have in front of me. As I have already stated in this sculpting series, you do learn from your mistakes.

The fiddle for this particular project is coming close to completion now. I’m really looking forward to completing the fiddle because it will really change the feel of the sculpture once it is attached to the Fiddler, our subject matter for this series. I still have to build out the arms and work on the details on various other body parts but at this stage in the game I’m comfortable to say that we are past the halfway mark in the sculpting process.

Read the rest of this entry »

New fiddle

Posted by goregt On April - 21 - 2007

Sculpting a new fiddle

Well, it is that time again where we need to get back to sculpting the fiddle. I started working on the fiddle and it was coming along ok but I just felt that I was going to have to put a lot of time into it to get it the way I want it to look.

I’m very comfortable sculpting things from life, like the human body and animals, but inanimate objects always present themselves as a challenge. The key to sculpting things like a fiddle is to make sure that the shape is symmetrical on all sides. Instead of spending a lot of time trying to get just the basic shape down, I decided to take the pumpkin carving template approach to my design.

The first step was to search the internet for a picture of a fiddle that I could use as my template. Once I located a picture I saved it to my computer and resized the image to the size that i need for my sculpture

Read the rest of this entry »

VIDEO

Enter the video embed code here. Remember to change the size to 320 x 270 in the embed code.

TAG CLOUD

Recommended Sites

About Me

Nothing special, just a self-taught sculptor having fun with my art and showing all of you the tips and tricks I use to create my own artwork

Twitter

    Photos

    Activate the Flickrss plugin to see the image thumbnails!